Pumpkin pie bars is the dessert I always turn to when I want the taste of classic pumpkin pie without the work of rolling out crust.
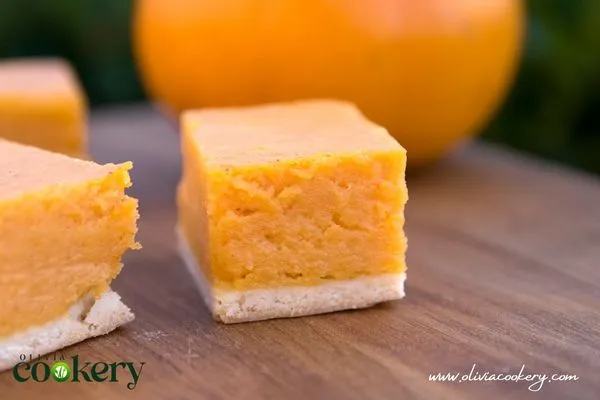
This easy pumpkin pie bar recipe has the same creamy filling you know and love, baked over a buttery graham cracker crust that holds together beautifully.
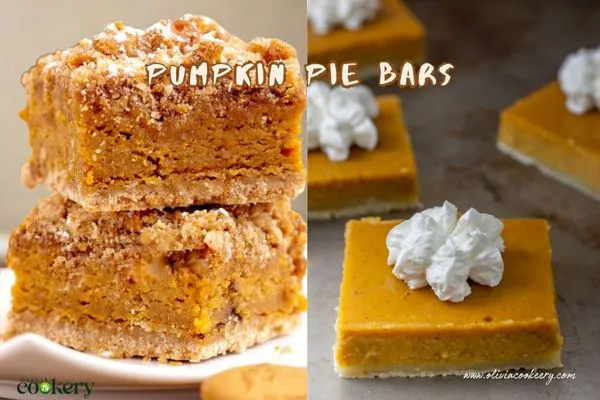
I love how simple it is to make and how easily it slices into perfect squares for sharing. Whether you’re serving pumpkin pie bars with shortbread crust at Thanksgiving, trying a version with cake mix for a shortcut, or keeping it light with pumpkin pie bars with no crust, this treat never disappoints.
It’s a cozy fall favorite that feels homemade but doesn’t take all day to prepare.
Why Love These Pumpkin Pie Bars?
I love baking desserts that feel festive but don’t require me to spend all day in the kitchen. These bars do exactly that.
The crust comes together in minutes, the filling is smooth and creamy, and once they’re baked, you can chill and slice them into perfect squares.
They’re ideal for Thanksgiving dessert tables, casual potlucks, or even just a weekday treat with coffee.
Pumpkin puree, warm pumpkin spice, and a mix of brown and white sugar give the filling a deep, cozy flavor. Pair that with the buttery crust, and you’ve got a dessert that tastes like a shortcut pumpkin pie but feels even more fun to serve.
History and Origin of Pumpkin Pie Desserts
Pumpkin desserts have a long history in American cooking. Pumpkin pie itself has been a holiday favorite since the 1600s, when early settlers used pumpkins in both savory and sweet dishes.
Over time, spices like cinnamon, nutmeg, and cloves were added, creating the pumpkin spice flavor we all know.
Pumpkin pie bars are a more modern take, inspired by bakers who wanted the classic flavor in a simpler format. Instead of rolling and crimping dough, a crust is pressed into a pan, topped with the filling, then baked and sliced.
Think of them as pumpkin pie’s laid-back cousin—perfect for feeding a crowd without extra fuss.
Recipe Overview
These Pumpkin Pie Bars are easy, flavorful, and perfect for sharing.
- Preparation Time: 15 minutes
- Cooking Time: 45 minutes
- Total Time: 1 hour
- Cuisine: American
- Course: Dessert
- Difficulty Level: Easy
- Yield: 16 bars
- Calories: ~220 per serving
Ingredients
For The Crust
- 1 ½ cups graham cracker crumbs
- ½ cup unsalted butter, melted
- ¼ cup sugar
For The Filling
- 1 can (15 oz) pumpkin puree
- ½ cup granulated sugar
- ½ cup brown sugar
- 2 teaspoons pumpkin pie spice
- ½ teaspoon salt
- 2 large eggs
- 1 cup milk
Instructions
- Prepare the pan
- Line a 9×13-inch baking dish with parchment paper for easy removal later. Preheat your oven to 350°F (175°C).
- Make the crust
- In a bowl, mix graham cracker crumbs, melted butter, and sugar until the mixture looks like wet sand.
- Press it evenly into the bottom of your pan. Use the back of a spoon to pack it firmly so it holds together after baking.
- Mix the filling
- In another bowl, whisk pumpkin puree, granulated sugar, brown sugar, pumpkin pie spice, and salt until smooth.
- Add eggs one at a time, whisking well after each. Stir in milk until combined.
- Bake the bars
- Pour the pumpkin mixture over the crust and spread evenly.
- Bake for 45 minutes, or until the center is set and a knife inserted near the middle comes out mostly clean.
- Cool and chill
- Let the bars cool to room temperature, then refrigerate for at least 2 hours before slicing. This helps them firm up and makes cutting easier.
My Secret Tips for Perfect Pumpkin Pie Bars
- Crust Variations: Try using crushed gingersnaps or vanilla wafers instead of graham crackers. Each adds a slightly different flavor.
- Dairy Options: Swap milk for evaporated milk or half-and-half for a creamier filling.
- Storage: Keep bars covered in the fridge for up to 5 days. They taste even better the next day.
- Make Ahead: Bake the bars a day before serving. Chill overnight, slice the next day, and you’ll have a stress-free dessert ready to go.
Exciting Variations and Serving Ideas
- Pumpkin Pie Bars with Shortbread Crust: Swap graham crackers for a buttery shortbread base.
- Pumpkin Pie Bars No Crust: Pour the filling directly into a greased pan for a lighter version.
- Pumpkin Pie Bars with Cake Mix: Use yellow cake mix for a quick crust or topping.
- Pumpkin Pie Bars with Oatmeal Crust: Add oats and brown sugar for a crumbly, rustic flavor.
- Toppings: Add whipped cream, cream cheese frosting swirls, or a sprinkle of pumpkin crumble bars on top.
Expert Tips & Troubleshooting
- Prevent cracks in the filling – Don’t overbake. Pull the bars out when the center is just set. They’ll firm up as they cool.
- Smooth filling every time – Whisk the eggs in gently and avoid overmixing. Too much air can cause bubbles and uneven texture.
- Even crust – Press the crust with steady pressure across the whole pan so one side isn’t thicker than the other.
- Avoid soggy crust – Bake the crust for 8–10 minutes before adding the filling if you like it extra firm.
- Clean slices – Use a sharp knife dipped in hot water, wipe between cuts, and you’ll get bakery-style bars.
- If the bars are too soft – Chill them longer. Pumpkin desserts need time in the fridge to fully set.
- If the crust crumbles – Next time, add a little more melted butter to bind the crumbs together.
Helpful Guides for Beginners
If you’re new to baking, don’t worry—these simple tips will make the process smooth and stress-free:
- Read the recipe first – Go through the whole recipe before you start. It helps you understand the steps and avoid surprises.
- Measure ingredients correctly – Use measuring cups for dry ingredients and a liquid measuring cup for wet ingredients. Level off flour with a flat edge to avoid adding too much.
- Room temperature ingredients – Butter, eggs, and milk mix more evenly when they’re not straight from the fridge.
- Don’t rush the crust – Press the crust firmly into the pan so it holds together after baking. A spoon or the bottom of a glass works perfectly.
- Check doneness early – Ovens vary. Start checking your bars or pies a few minutes before the recipe’s bake time ends.
- Let it cool – Desserts like pumpkin pie bars need time to set. Cooling and chilling make slicing neat and easy.
Frequently Asked Questions
Can I make pumpkin pie bars gluten free?
Yes! Just use gluten-free graham crackers or gluten-free oats for the crust.
How do I know when pumpkin pie bars are done baking?
They’re ready when the filling is set in the center and no longer jiggles when you shake the pan gently.
Can I freeze pumpkin pie bars?
Yes, wrap slices individually and freeze for up to 2 months. Thaw in the fridge before serving.
Can I add cream cheese to pumpkin pie bars?
Absolutely! Swirl softened cream cheese into the filling before baking for a pumpkin cream cheese bar version.
Video Tutorial
Conclusion
Pumpkin pie bars is a recipe that never lets me down. It’s simple, flexible, and always hits that balance of spiced pumpkin filling with a sturdy crust.
From pumpkin pie bars with shortbread crust for a buttery bite, pumpkin pie bars with no crust for a lighter feel, or even pumpkin pie bars with cake mix when time is short, this dessert adapts to your kitchen and schedule.
Easy pumpkin pie bars are a perfect way to add warmth to your table, whether it’s for Thanksgiving or just a cozy evening treat.
More Delicious Recipes
Magical Food Mixer Bread Recipe
Smoothie King Peanut Power Plus Recipe
Butter Chicken Moussaka Recipe
Ingredients
Method
- Line a 9×13-inch baking dish with parchment paper for easy removal later. Preheat your oven to 350°F (175°C).
- In a bowl, mix graham cracker crumbs, melted butter, and sugar until the mixture looks like wet sand.
- Press it evenly into the bottom of your pan. Use the back of a spoon to pack it firmly so it holds together after baking.
- In another bowl, whisk pumpkin puree, granulated sugar, brown sugar, pumpkin pie spice, and salt until smooth.
- Add eggs one at a time, whisking well after each. Stir in milk until combined.
- Pour the pumpkin mixture over the crust and spread evenly.
- Bake for 45 minutes, or until the center is set and a knife inserted near the middle comes out mostly clean.
- Let the bars cool to room temperature, then refrigerate for at least 2 hours before slicing. This helps them firm up and makes cutting easier.
Notes
Tips & Tricks
- Line the pan with parchment paper – This makes lifting out the bars and slicing them so much easier.
- Pack the crust tightly – Use the back of a spoon or the bottom of a glass to press the crust firmly. This keeps it from crumbling.
- Use canned pumpkin puree – It gives a consistent texture and flavor. Don’t swap it with pumpkin pie filling—it already has sugar and spices.
- Chill before slicing – Cold bars slice cleanly without falling apart. Aim for at least 2 hours in the fridge.
- Spice swap – If you don’t have pumpkin pie spice, mix cinnamon, nutmeg, and ginger instead.
- Make-ahead friendly – These bars taste even better the next day, so feel free to bake ahead for gatherings.

- Best Pistachio Cold Foam Recipe for Coffee Lovers - October 18, 2025
- Best Banana Caramel Peanut Cheesecakes You Can Make - October 6, 2025
- Best Baked Cream Cheese Wontons – Crispy, and Cheesy - September 30, 2025
1 thought on “Pumpkin Pie Bars with Cake Mix | Quick Dessert Idea”